Monday, May 17, 2010

Project Spyplane

Project Spyplane is by far my most successful aerial photography/video project.

The plan was to build a flying machine that could carry heavy filming or photography equipment to high altitude and on long duration flight, just like a spy plane. It must also be capable to take off in a short distance either on solid ground, ice, or water.


Eventually I’ve chosen one of my half retired RC plane, the GWS SlowStick, for converting into such a flying machine. This aircraft features a dihedral wing with a spectacular under-chamfered air foil, which gives it the right criteria to be modified into a steady heavy lifting platform. I took away the stock motor and replaced it with a brushless motor. I've also used a 3-cell 11.1v Li-po battery for the power system. Finally I replaced the landing gears with removable floats so that I could takeoff and land on ice or water, or switch it back into ground landing mode easily.


Test flying shows exceptionally good handling performance. My modifications worked well. I’m very glad with that and soon I started to hang different cameras and video recorders onto this aircraft.


During the entire project, it has successfully carried three different cameras on multiple missions. The aircraft has been flown in snow, land on river and ice, and also flew in the summer season on relatively calm weather. Lots of amazing video footages and photos had been taken in these flights. I am sure you will enjoy the youtube videos and still pictures as much as I do!


Thursday, May 13, 2010

The Giant Flying Wing

"Flying Wing" is a type of aircraft that has it's fuselarge blended into the wings. As a result, there is no fuselarge whatsoever. The wing itself is the entire aircraft. The Horten Brothers has built several fantastic sailplanes in the 1940's by using this concept. They have proven that Flying Wings has many advantages that conventional aircraft don't. Like the Hortens, I am also fascinated by Flying Wings.


[My 1st Flying Wing Glider Attempt]

My First Attempt
A few years ago I had my first attempt to build a Flying Wing but it turnned out to be a bit too heavy to fly in weak lift conditions. Since then my plane building technics has advanced a lot and I decided to once again building a new Flying Wing glider.

The New Design
Unlike the previous design, the new glider features a wing with a much higher aspect ratio. The wing itself is desgined to be hollow, with a aluminum spar as the main support and covered in 4mm foam. Two carbon fiber rods are also attached onto the wing's leading edge for reinforcement.


Flying


Eeventually, this new glider turns out to be quite a huge Flying Wing. It has a wingspan of about 1.7 meters, which is almost as tall as I am if holded vertically. Flying it is such a joy. It soars perfectly even in very light lift conditions. However on a windy day with lots of lift coming from the slopes, it would turn into a flying beast with very aggressive flying speed. It is also capable of doing tight loops, though it's rolling rate is relatively low due to its wide wing. I am very pleased with it's overall performance. I am pretty sure that this is one of the best gliders that I've built.


[The Flying Wing Soaring in Light Lift]

Nitro Delta


The Nitro Delta is my first Nitro Engine flying wing design. It is designed with a pair of special wing-tips that look alike to the MXS (one of the Red Bull Air Race Aircraft). The main purpose of this design project is to investigate the use of such wing-tip configurations on a flying wing to reduce drag and improve performance.

Test flying shows that this speedy aircraft has impressive handling performance. Despite having a relatively small engine (O.S 10LA), it is capable of making very tight loops and rolls, with predictable and easy-to-recover stalling habits. It is also very stable and easy to control; even my beginner friend has no problem flying it. I think the wing tips concept proved to be a brilliant choice for this particular flying wing.

The only area of improvement of this aircraft is its landing gear. Unfortunately the front and rear gears are built too closely together, making a soft landing extremely hard. To reduce the possibility of a prop-strike, I have to shut the engine down before touching down. That way the propeller would not be spinning and the chance of it hitting the ground is minimized.

1:14 Scaled Cessna 152


During the Summer of 2007 I was passing by Toronto Buttonville Airport. A flying school's poster of an introductry flight caught my eye, which at the end turns into my first ever piloting experience. To this day I still remember the excitement I had when I first climbed into that Cessna cockpit...

A year later, I decided to build my own Cessna 152, a scaled down remote control one of course. I wanted to try hand drafting the 1:14 scaled down plans by just looking into varies picture an aircraft. At first it was a bit difficult to draw it to scale, but eventually I think I got it right. I was quite happy with it after it was done.


Building the aircraft wasn't all that hard. I simply copy the plans onto a sheet of 4mm foam, and hot glued all the pieces together. All the eletronics are hidden inside the airframe which made this little aircraft incredibly scaled looking. I also drew some details onto the fuselage, just to make it look more like a real Cessna 152.

Flying this tiny RC plane is such a pleasure, as long as the wind is calm. I had the C.G balanced point shifted a bit foward just to give it more stability in windy condition. The 7.2V 2cell 800mah Li-Po battery proved to be more than enough to power this ultralight plane. Landing is also easy. I simply shut the the motor and let it glides itself down. Overall I am very happy with this project. I enjoyed a lot building and flying the 1:14 Cessna 152.


Scaled P-51 Mustang

Drawing Board

I have always wanted to build a scaled model of a classic war bird. One of the WWII planes that I really love is of course the famous P-51 Mustang.


PhotobucketPhotobucketPhotobucket

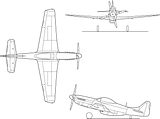
[1st] A P-51 3Views Drawing Found on Google

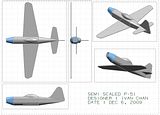
[2nd] Virtual 3-D Model of the P-51 I Desgined

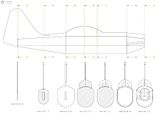
[3rd] Corss Section Drawing of the P-51 Plans


By studying some of the 3 view-drawings and pictures on Google, I made myself a scaled down P-51 plans in Solid Works NX. I created a 3-D sclaed down model of the P-51 in NX whcih I then turned it into a set of 1:1 plans that I could printed out and follow. With the plans being done, I started the actual contrstuion works.

Construction

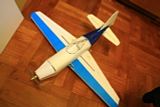
I’ve chosen 4mm foam for constructing the wings and most part of the fuselage. However, the tail part of the fuselage (the blue part of the aircraft) is build with wooden straws and covered with heat-shrink coverings for weight saving. A 2mm carbon fiber rod is also hot glued onto the wing for reinforcement. Noted the wing features a KF Airfoil. This is the first time that I’ve ever attempted to use KF airfoil for my RC plane. A 6x4 propeller is used and a 3 cell 11.1v 1200mah Li-po battery is used.

Test Flying


Ground testing shows that the power unit do creates quite some serious thrust. However the P-51 seems to be incredibly unstable on pitch during the first flight. I could hardly maintain a level flight. I thought the aircraft was being tail too heavy so after landing it I moved the C.G forward. It doesn’t seem to help at all. I suspect that the wing loading of this aircraft is a little too heavy and the tail wing is built too small. As a result, the main wing is always at the edge of stalling while the small tail plane is unable to provide sufficient horizontal stability.

Photobucket

Even though the P-51 doesn’t turn out to be a great flying machine, I did gain valuable experience in creating my own plans using Solid Works NX. It is so much fun seeing something that's on a blueprint turnning in to a real flying mechine.


Saturday, May 1, 2010

Mig-29


The Mig-29 is my first RC aircraft that has a full set of CAD design plans. I made the plans in Solid Works NX and then converted them in to PDF files. These PDF plans are in full scale of the RC Mig-29. Therefore to build the aircraft, I could simply print out the plans and copy them onto the piece of 4mm foam that the plane would be built on. After all the foam components are shaped, I hot glue them together and install all the required electronics onto the airframe. The Mig-29 is very easy to assemble and would only take little time to complete.
[Left] Assembly Guide [Right] Full Scale Plans
Click the images above to download the PDF plans and assembly guide.

This aircraft doesn't has a particular high flying speed, but it's aerobatic ability is however outstanding. Loops and rolls are tight and straight. Inverted flight is also fairly easy, only little pitch correction is needed. It is a small, fun aircraft that has just the right size and speed to fly in a small park.